Common Cookie Cutter Design Mistakes
Avoid noisy source images, unreadable text, bad scale, and over-detailed previews before you print.
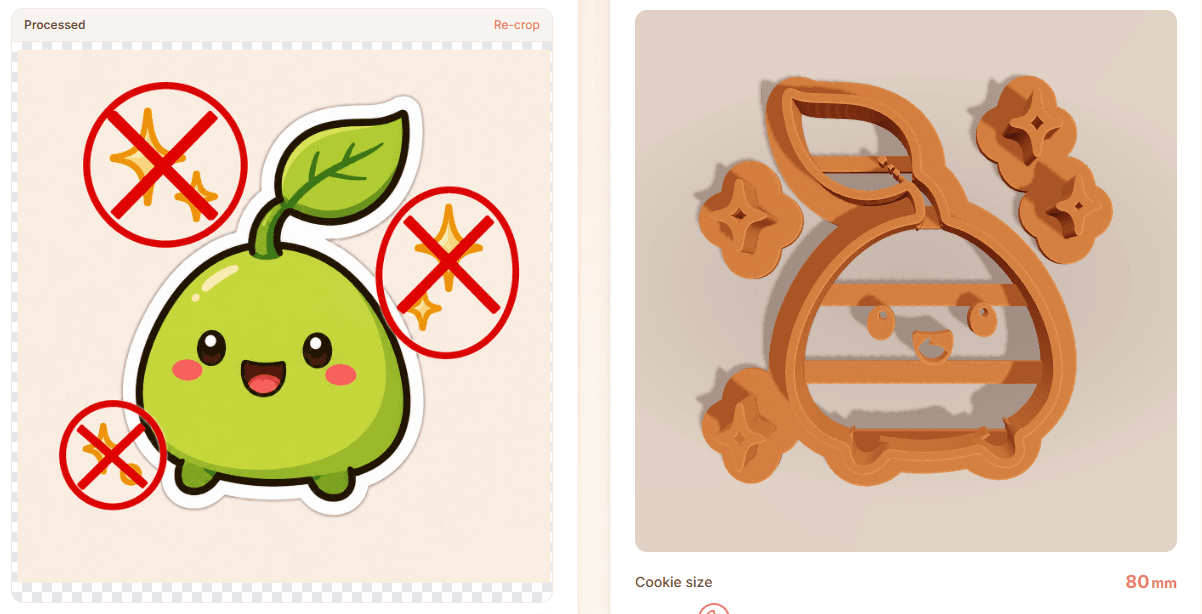
Mistake 1: designing for the screen instead of dough
A design can look excellent on screen and still fail as a cookie cutter. Dough has thickness, stretch, stickiness, and spread. Details that look sharp in a preview can close up after cutting or baking.
Before exporting, use the CutterForge preview as a reality check: the outline should still be recognizable if it were reduced to a simple cookie silhouette.
Mistake 2: keeping too many tiny details
Tiny holes, narrow gaps, thin lines, and isolated marks are the most common source of messy cookie results. They may look interesting in the source image, but they can become unreadable in dough or distracting in the preview.
Use the generator or design tool preview as a QA step. If a detail only matters at extreme zoom, simplify the source, adjust threshold, use invert details, or make the cookie larger.
- Do not keep every photo texture.
- Do not rely on tiny logo taglines.
- Do not use very thin script text for small cutters.
- Do not skip the CutterForge preview before downloading.
Mistake 3: skipping a test print
A test print catches slicer behavior, wall strength, hand feel, and dough release. For Etsy sellers or client orders, a small failed test is cheaper than a full batch of fragile cutters.
Download the final STL after the CutterForge preview looks right, then use the slicer and test print to confirm printer settings and practical handling.
Ready to build it in CutterForge?
Open CutterForge, preview the cutter, and catch weak details before printing.