Design cookie cutters visually before you print
CutterForge is a cookie cutter design tool for people who want visual control without CAD. Arrange text, preview the cutter, adjust sizing, and export a printable STL file.
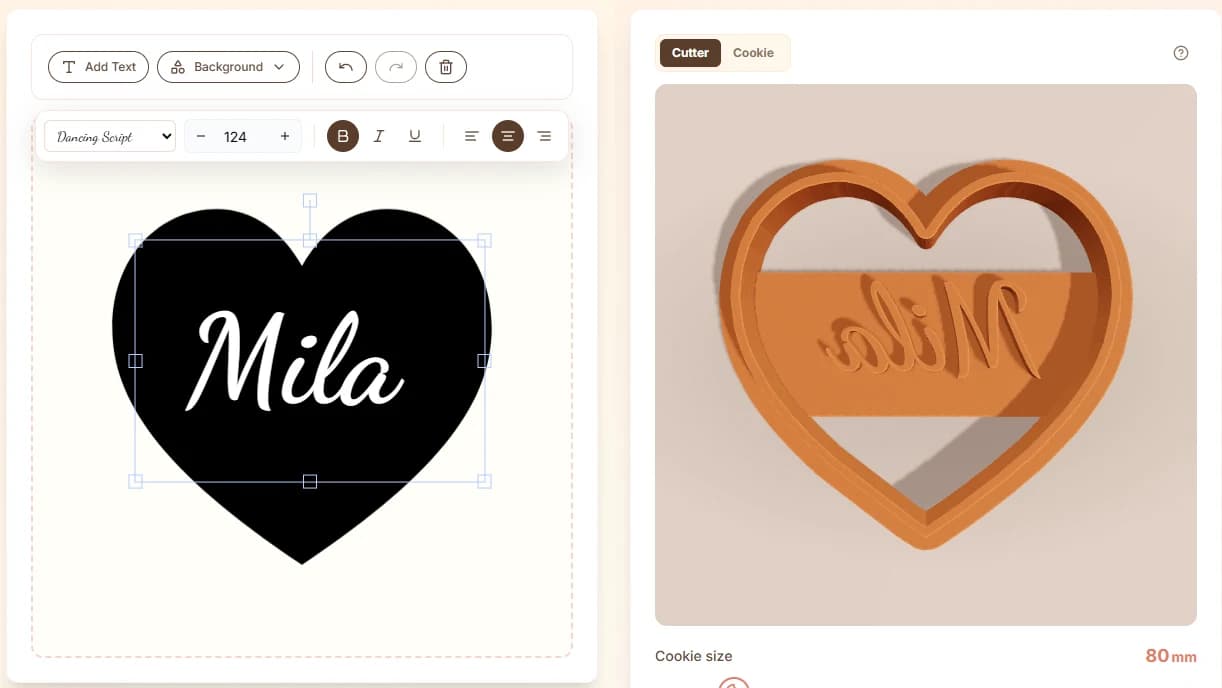
Built for the real path from idea to cookie cutter.
Use the text editor and visual canvas to create readable custom cutter layouts for names, labels, and short messages.
The side-by-side preview helps you see how the cutter will look before you export.
When the design is ready, download an STL file and prepare it in your slicer.
Use CutterForge to design names, short messages, labels, initials, and event phrases as printable STL cookie cutters.
Four steps, then a file you can print.
- 01
Add text or a short phrase to the canvas.
- 02
Choose a sturdy font and layout for clean printing.
- 03
Preview the cutter beside the editable design.
- 04
Set the cookie size and download the STL.
Useful for more than one shape.
What this workflow produces
Example input
A name, number, team phrase, or short message such as "Noah" or "Happy 30".
Example output
A text-based STL cutter with readable letter shapes, balanced spacing, and a printable outer cutting wall.
Export details before you print
Files you get
- STL file for the text cutter
- Project thumbnail for saved designs
- Editable design state for changing text or size later
Inputs supported
- Short words and names
- Numbers and ages
- Simple labels
- Short event phrases
Slicers and printers
STL exports can be prepared in Bambu Studio, PrusaSlicer, OrcaSlicer, Ultimaker Cura and similar slicers for printers such as Bambu Lab, Prusa, Creality, Anycubic, Elegoo.
Use roughly 1.0-1.2 mm for text cutters when letters have tight corners or narrow counters.
Printing tips
- Choose bolder fonts for stronger letter strokes.
- Avoid very long phrases unless the cutter is physically large.
- Check small counters in letters such as e, a, o, and p in slicer preview.
Limitations to know
- Very thin decorative fonts can create weak or disconnected geometry.
- Tiny punctuation and script flourishes may not survive printing.
- Long phrases need more size to remain readable in dough.
AI, image upload, or text mode?
Use AI when
Use AI for illustrated concepts, not for exact typography.
Use image upload when
Use image upload for a finished typographic logo or hand-lettered artwork.
Use text mode when
Use the text tool when you need editable names, ages, labels, and short phrases.
Avoid weak cutter files
Using a delicate script font for a small cutter.
Adding too many words to one cutter.
Ignoring small internal letter holes in slicer preview.
Scaling text down until strokes become thinner than your nozzle can print cleanly.
Common questions
Can I visually edit a cutter?
Yes. CutterForge includes a visual editor for text designs and previews the generated cutter.
Can I change the cutter size?
Yes. The editor includes cookie size controls before download.
Does the design tool create STL files?
Yes. The finished design can be downloaded as an STL file.
What text works best for cookie cutters?
Short names, ages, labels, and simple phrases work best. Bolder letterforms usually print and cut better than delicate scripts.
Can I make name cookie cutters?
Yes. The text tool is designed for name cutters, short messages, birthdays, and event labels.
Can text cutters be edited later?
Saved projects can keep the editable design state so you can return to a design and adjust text or size.
Which wall thickness is best for text cutters?
About 1.0-1.2 mm is a useful starting range because letters often have tight curves and narrow details.
When is image upload better than the text tool?
Use image upload if your text is already a finished logo, custom lettering, or artwork that you do not want to recreate with editable text.
Can I print the STL on a normal FDM printer?
Yes. Review the STL in your slicer and choose print settings appropriate for your nozzle, filament, and food-contact workflow.